Search Results
48 results found with an empty search
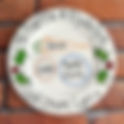
- How to Paint a Christmas Eve Plate: A Step-by-Step Guide for Beginners
Christmas Eve plates are a wonderful tradition for leaving out treats for Santa and his reindeer. With a touch of creativity, you can create a beautiful, personalised plate that captures the festive spirit and becomes a cherished keepsake for years to come. Whether you’re painting with kids or trying your hand at a fun new hobby, this step-by-step guide will walk you through how to paint your own Christmas Eve plate using acrylic paints and water-based varnish. What You’ll Need Before we get started, gather the following materials: A blank white ceramic bisque plate (unfired glaze-free plate). Acrylic paints (red, green, gold, white, and black are festive staples, but feel free to get creative!). A selection of paintbrushes: flat brush for base layers, round brush for details, and a fine detail brush for small touches. Water-based varnish (for a protective finish). Festive shaped stencils (great for adding detail without painting free hand). A pencil and eraser. A paint palette or tray (great for paint mixing). A cup of water for rinsing brushes. Paper towels or a rag for wiping brushes. A plate stand or paper underneath to protect your work surface. Step 1: Plan Your Design Start by deciding what you’d like your Christmas Eve plate to look like. Here are a few simple and festive ideas: A message like “Cookies for Santa” or “Santa & Rudolph’s Treats.” Festive illustrations like holly, candy canes, or a Christmas tree. Sections for different treats, such as “Carrots for Rudolph” or “Milk for Santa.” Use a pencil to lightly sketch your design onto the plate. Don’t press too hard – you’ll paint over it later, but any dark lines may show through the dried paint. Step 2: Paint the Background (Optional) If you’d like a coloured background on your plate, use a flat brush to apply a thin, even coat of paint to the entire surface. Tip: Light colours like white, pale blue, or gold work well for Christmas designs. Let the background dry completely before moving to the next step (this usually takes about 15-20 minutes for acrylics). Or use a hairdryer to speed up the process. If you prefer a white base (perfect for a classic look), skip this step. Step 3: Add Your Main Design Use a round brush or detail brush to carefully paint your main design, following your pencil sketch. For text, use a fine detail brush (or paint pen) and take your time to keep your letters neat. Block letters and festive fonts work well – you can even trace letters printed from a computer if you’d like. For festive decorations, such as holly leaves or stars, start with the largest shapes first and then add smaller details like berries or highlights later. Tip: Thin your acrylic paint slightly with water for smooth, even lines. Don’t over-dilute, as this can affect the paint’s opacity. Step 4: Add Festive Details Now it’s time to make your plate truly magical! Use metallic paints (like gold or silver) for accents – these add a festive sparkle. Add highlights and shadows to your design by layering lighter and darker shades of your colours. For example, use a lighter green on the edges of holly leaves to make them pop. If you’re painting snowflakes or stars, use a white paint pen or the tip of a small round brush for precision. Stamp in detail. Festive shaped stamps are a great way to add detail without the need for free hand decoration. Lightly dip you stamp in the paint, or paint the stamp surface with a brush, then apply to your plate. Tis the season to be glittery. Christmas is always a good reason to go big with glitter. Add loose glitter whilst your paint is still wet and shake off the excess or use glitter glue to add some sparkly details. Step 5: Let It Dry Allow your plate to dry completely. Acrylic paint dries quickly, but it’s best to wait at least 1-2 hours before moving to the next step to ensure there are no smudges. The good old hairdryer will help speed the process along, if you like to limit your waiting like me. Step 6: Seal Your Design Once your paint is completely dry, apply a layer of water-based varnish to protect your design and give it a glossy finish. Use a soft, clean brush to apply the varnish in even strokes across the entire plate. Apply several layers of varnish, as per manufacturers instructions, for ultimate protection. Let the varnish dry for at least 24 hours before using the plate. Important: Painted plates with acrylics are for decorative purposes only and should not be used for food directly. If you want to use the plate for snacks or treats, line it with baking parchment, or leave painted areas away from contact with food. Or use wrapped treats. Varnishing allows the surface to be gently wiped clean with a slightly damp cloth. Step 7: Enjoy Your Plate! Your Christmas Eve plate is ready to bring festive cheer to your home! Use it to leave out cookies for Santa and carrots for the reindeer, or display it as a decoration throughout the Christmas season. Additional Tips for Beginners Practice Makes Perfect: Test your design on a piece of paper before painting the plate. Clean Brushes Regularly: Rinse your brushes thoroughly with water between colours to avoid mixing unwanted shades. Embrace Imperfection: Hand-painted items are unique and charming, so don’t worry if it’s not perfect. Create Your Own Festive Tradition (Now you know how to paint a Christmas Eve plate) Painting a Christmas Eve plate is a fun, creative way to prepare for the holidays and make special memories with your family. Whether it’s a new family tradition or a thoughtful handmade gift, your plate will bring joy year after year. Ready to get started? Check out my Paint Your Own Plate for all the materials you need to make your own festive creations. Don’t forget to share your painted plates with me on social media using the hashtag #ArtyPaxCreation ! Happy Painting and Merry Christmas! 🎄
- Best Brushes for Painting Ceramic: Know Your Fan from Your Filbert
A Comprehensive Guide to the Best Brushes for Painting Ceramic Bisque with Acrylics When it comes to painting ceramic bisque with acrylic paints, selecting the right brush can make all the difference in achieving the best results. The variety of brush types available, from fan brushes to filberts, each offer unique effects that can enhance your ceramic painting experience. Whether you're painting delicate details on a puffin or adding bold strokes to a barn owl, understanding the different types of brushes can help elevate your work. In this blog post, we’ll take a closer look at the best brushes for painting ceramic bisque with acrylics, breaking down what each brush type is, the effects they create, and how to use them effectively. Round Brushes: Precision and Control Round brushes are versatile and are among the most commonly used brushes when painting ceramic bisque with acrylics. These brushes have a round, pointed tip and can be used for both fine details and broader strokes, depending on the size. Smaller round brushes are perfect for delicate work like painting fine lines or tiny details, while larger round brushes are great for filling in larger areas. Effect: Great for detailed lines, fine dots, and intricate designs. Best for: Adding highlights to animal eyes or painting fine feathers on birds. Liner Brushes: Perfect for Fine Lines Liner brushes, also known as rigger brushes, are long and have fine bristles that come to a point. They are designed to hold a lot of paint and release it slowly, making them ideal for painting long, uninterrupted lines. These brushes are perfect for adding intricate details to your ceramic bisque, such as whiskers on a fox or the delicate markings on a kingfisher’s wings. Effect: Ideal for thin, consistent lines. Best for: Outlining or creating intricate patterns, such as stripes or small feathers. Flat Brushes: Smooth, Even Coverage Flat brushes have a square or rectangular shape and are best for filling in large areas with smooth, even strokes. They hold a good amount of paint, making them ideal for painting backgrounds or base layers on your ceramic piece. When turned on their side, flat brushes can also create crisp, straight lines, perfect for adding angular details. Effect: Smooth, even coverage or sharp lines when used on the side. Best for: Painting backgrounds or base colours on larger bisque figures like a life-sized skull or ceramic plates. Fan Brushes: Great for Texture Fan brushes have bristles that fan out and are great for adding texture to your ceramic pieces. They’re particularly useful for creating effects like feathers, grass, or fur. The fan shape helps spread the paint out evenly, creating a soft, textured effect that’s perfect for adding a realistic finish to nature inspired ceramics. Effect: Soft, textured strokes that resemble feathers or fur. Best for: Painting the texture of feathers on a puffin or the wispy fur of a red fox. Filbert Brushes: Soft, Rounded Strokes Filbert brushes are a cross between a round brush and a flat brush, featuring an oval-shaped tip. This shape allows you to achieve soft, rounded strokes, making them ideal for blending colours or creating curved shapes. Filberts are excellent for painting ceramic bisque with smooth transitions between colours, especially when blending light and shadow. Effect: Soft, rounded strokes and smooth blends. Best for: Creating soft edges or shading on the wings of a barn owl or the curves of a duck. Detail Brushes: Precision at Its Best Detail brushes are extremely fine-tipped brushes designed for ultra-precise work. These brushes are perfect for adding the tiniest details to your ceramic pieces, from the eyes of your ceramic animals to the fine patterns in feathers or scales. They are essential for intricate designs that require a high level of control. Effect: Extremely fine and precise details. Best for: Tiny dots, delicate lines, and intricate details on nature inspired ceramic figures. Angled Brushes: Sharp Edges and Precision Angled brushes have a slanted tip, making them perfect for painting sharp edges and creating precise lines with ease. These brushes are great for adding intricate details where you need fine control, such as painting the beak of a bird or the fur markings of a pheasant. They also excel at painting clean, defined edges in tight corners. Effect: Sharp edges and precise lines. Best for: Adding definition to areas like bird beaks, claws, or the edges of feathers. Best Brush Techniques for Painting Ceramic Bisque When painting ceramic bisque with acrylics, using the right techniques can also impact your results. Here are some tips for making the most of your brushes: Use Thin Layers: Acrylic paint works best when applied in thin layers. This prevents cracking and ensures the paint dries evenly. Blending with Filbert Brushes: For a soft, blended effect, use a filbert brush to gently blend colours while the paint is still wet. Dry Brushing with Fan or Flat Brushes: For a textured look, dip your fan or flat brush in paint, then wipe off most of the paint before lightly brushing it onto your ceramic piece. This technique works wonders for creating the appearance of feathers or fur. Detail Work with Liner Brushes: Use liner or detail brushes for the final touches, such as adding highlights or fine patterns. Conclusion: Finding the Perfect Brush for Your Ceramic Painting Choosing the right brush for your ceramic bisque painting project can enhance your design and make the painting process more enjoyable. Each brush type offers a unique effect, from the fine lines of a liner brush to the soft, blended strokes of a filbert. A variety of the brushes listed above will give you a great start to helping you achieve the effects you want. Whether you're painting a puffin, a barn owl, or a kingfisher, knowing your fan from your filbert will help you achieve beautiful results and bring your ceramic figures to life! Ready to paint your own nature-inspired ceramic figure? Explore our wide selection of ceramic bisque figures and try out your range of brushes to make your next project a masterpiece. Don’t forget to tag me in your creations using #ArtyPaxCreation on social media!
- How to Paint Pottery Without a Kiln: A Complete & Simple Guide
Painting ceramics and pottery is a creative and rewarding hobby that anyone can enjoy. But did you know you can paint your pottery pieces at home without the need for a kiln? If you’re looking to create beautiful, long-lasting designs without the hassle of kiln firing, you’re in the right place. In this blog post, I’ll guide you through how to paint ceramics without the need for that second firing, using simple and accessible materials. Whether you’re new to pottery painting or a seasoned pro, this guide will help you create stunning pieces from the comfort of your home. Why Skip the Kiln Firing? Traditional pottery involves two kiln firings: the first to transform clay into bisque ware and the second to set the glaze. However, not everyone has access to a kiln, and the process can be time consuming and costly. Luckily, you can achieve professional looking results without that second firing by using alternative methods that are easy, affordable, and just as durable. Materials You’ll Need Before I dive into the process, let’s take a look at the materials you’ll need to paint your ceramics at home: Bisque Ceramics: These are pre-fired ceramic pieces that are ready to be painted. At ArtyPax, I offer a wide range of nature inspired bisque figures perfect for your next project. Acrylic Paints: Acrylic paints are versatile, quick drying, and available in a wide variety of colours. They are perfect for creating vibrant designs on bisque ceramics. Sealant: To protect your design and give your piece a stunning finish, you’ll need a clear, water-based varnish. This can be a spray or brush-on type and can be matte or gloss. Brushes: A variety of brushes in different sizes will help you achieve detailed and broad strokes, depending on the design you’d like to paint. Palette: A mixing palette is useful for blending your acrylic paints, although it’s optional depending on how you like to paint. Step-by-Step Guide to Painting Pottery Without a Kiln 1. Choose Your Bisque Ceramic Piece Begin by selecting a bisque ceramic piece that inspires you. At ArtyPax, I offer a range of nature inspired designs such as owls, foxes, and puffins, which are perfect for bringing the outdoors into your home. 2. Prepare Your Workspace Set up your painting area with all the necessary materials listed above. Make sure your workspace is well lit (natural light is the best, but any light is better than painting in the dark) and protected from spills with newspaper, a plastic sheet or a wipe clean tablecloth. Don’t forget an apron or some old clothes for yourself. 3. Plan Your Design Take a moment to plan your design. Whether you’re going for a detailed nature scene or a simple colour pattern, having a clear vision will help guide your painting process. Some people like to draw their design first, or if you’re like me & just want to get on & paint, I have a rough idea in my mind. I may mark the design out on the bisque in pencil or a fine line of black paint just as a reference of what I’d like where. 4. Apply the Acrylic Paint Begin painting your ceramic piece with acrylic paints. Start with a base coat if necessary (Tip: even a base layer of white can make the coloured layers easier to apply, as it makes the surface smoother to paint. It also makes mistakes easier to remove) and allow each layer to dry before applying the next. Acrylics dry quickly, so you won’t have to wait long between coats, (Tip: if you do want to speed up the process, use a hairdryer). Use smaller brushes for intricate details and larger brushes for broad strokes. 5. Add Details and Texture Once your base coat is dry, add any details or textures. You can create a variety of effects with acrylic paints, from smooth gradients to textured surfaces. Don’t be afraid to experiment with different techniques to achieve your desired look. 6. Let It Dry Completely After you’ve finished painting, allow your piece to dry completely. This usually takes a few hours, depending on the thickness of the paint layers. Ensure it’s fully dry before moving on to the next step. Use the good old hairdryer again to help the process along. 7. Seal Your Ceramic Piece To protect your artwork and give it a professional finish, apply a clear, water-based varnish. This will not only make your piece water-resistant but will also enhance the vibrancy of the colours. Spray sealants are easy to use and provide an even coat, but brush-on sealants are great for more control over the application. The choice is yours, along with choosing between matte & gloss finishes. Tips for Long-Lasting Results Use Multiple Thin Coats: When applying paint and sealant, thin coats work best. This prevents cracking and ensures a smooth, even finish. Avoid Harsh Chemicals: When cleaning your painted ceramics, avoid using harsh chemicals that could damage the paint. A soft cloth, just damp with a mild soap will do the trick. Display Indoors: For longevity, it’s best to display your painted ceramics indoors, away from direct sunlight, which can fade colours over a long time. You can place your ceramics in the garden. All you need is to apply a water based outdoor varnish (such as Mod Podge) and bring it in when frost are due, to help protect it for many years to come. Why ArtyPax? At ArtyPax, I specialize in nature inspired paint your own ceramics, perfect for hobbyists & craft lovers looking to create beautiful art without a kiln. My bisque ceramics are high quality and ready to paint, making them ideal for both beginners and experienced artists alike. Plus, with my wide selection of designs, you’re sure to find the perfect piece to spark your creativity. Conclusion Painting ceramics without a kiln is an accessible and enjoyable hobby that anyone can do at home. By using acrylic paints and sealants, you can create stunning, durable pieces without the need for a second firing. So why not give it a try? With ArtyPax’s nature inspired bisque ceramics, you’ll have everything you need to create beautiful art that reflects your love for the natural world. Ready to start your next project? Explore my range of bisque ceramics and get painting today! Don’t forget to share your creations with me on social media using #ArtyPaxCreations . I can’t wait to see what you create!
- ArtyPax Wins 'Pottery Painting Kit eTailer of the Year 2024 - UK' by LuxLife
I am over the moon to announce that ArtyPax has been awarded the prestigious title of 'Pottery Painting Kit eTailer of the Year 2024 - UK' by LuxLife as part of their Perfect Gift Awards 2024! For the second year in a row. This recognition is a testament to the dedication to providing high-quality, nature-inspired paint your own pottery kits that inspire creativity and bring joy to my customers. Join me as I celebrate this incredible achievement and share what makes ArtyPax the perfect choice for your pottery painting needs. A Prestigious Recognition: The LuxLife Perfect Gift Awards are renowned for recognizing excellence in the gift industry, celebrating businesses that offer unique, high-quality products and exceptional customer experiences. Winning 'Pottery Painting Kit eTailer of the Year 2024 - UK' is an incredible honour for ArtyPax, and I couldn't be more thrilled to be recognized for the passion and commitment to crafting beautiful, nature inspired pottery kits. What Sets ArtyPax Apart: At ArtyPax, I believe that nature has the power to connect people with art and inspire creativity. My pottery painting kits are carefully designed to capture the wonders of the natural world, featuring charming designs like owls, puffins, and foxes. Each kit comes with everything you need to create your masterpiece, including high-quality ceramic bisque figures, vibrant acrylic paints, detailed instructions and ceramic care guide. Why My Kits Make the Perfect Gift: Whether you're looking for a thoughtful gift for a loved one or a fun activity to enjoy with family and friends, ArtyPax pottery painting kits are the perfect choice. Here’s why: Creativity for All Ages: My kits are designed to be enjoyed by people of all ages, making them a fantastic gift for children and adults alike. Whether they be beginners or experienced. Nature Inspired Designs: Each kit features beautiful, nature inspired figures & designs that bring the charm of the outdoors into your home. Complete Kit: You can choose a ceramic figure only & use your own art materials. Or add paints, making the kit come with everything you need to get started, including ceramic bisque figures, acrylic paints, and easy-to-follow instructions. Quality Materials: I use only the highest quality materials to ensure that your finished piece is both beautiful and durable. My Journey to Success: Winning this award is a milestone in my journey, and I owe my success to my amazing customers. Your support and enthusiasm for my products have driven me to continuously innovate and improve. From my humble beginnings to becoming the UK's top pottery painting kit eTailer, my commitment to quality and creativity has never wavered. Pottery Painting Kit Customer Testimonials: Don't just take my word for it—my customers love ArtyPax kits! Here are a few of the wonderful things they've said: "The items are lovely and were received quickly, despite a Bank Holiday. They were well packed for their journey and are perfect. Can’t wait to start painting them." "Girlfriend couldn’t be happier! Date night sorted." "Exactly what I was looking for. Don’t see many items like this. Perfect 5* service” Looking Ahead: As I celebrate this amazing achievement, I’m excited to continue bringing joy and creativity to you, my customers. I have lots of exciting plans for the future, including new nature inspired designs and even more creative kits to choose from. Stay tuned for what's next from ArtyPax! Winning the 'Pottery Painting Kit eTailer of the Year 2024 - UK' by LuxLife is a proud moment for ArtyPax. I’m incredibly grateful for the support of my customers and the recognition from LuxLife. As I continue to grow and innovate, I remain committed to providing the best pottery painting kits that inspire creativity and bring the beauty of nature into your home. Ready to explore our award-winning pottery painting kits? Visit my online store and discover the perfect kit for you or your loved ones. Thank you for being part of my journey, and here’s to many more creative adventures ahead!
- Ocean Wildlife Wonders: My Adventure at the Hunstanton Sealife Centre
Hello, nature lovers! When I'm not in the studio creating nature inspired paint your own pottery kits, you can often find me exploring the great outdoors or visiting amazing places filled with wildlife. Recently, I had the pleasure of spending a delightful day at the Hunstanton Sealife Centre and I thought I’d bring you along with me on my adventure out of the studio. From fascinating penguin talks to heartwarming seal pup rescues, it was a day brimming with ocean wonders and unforgettable moments. Plus broccoli (More on that later). Nostalgia Under the Waves: I had the pleasure of babysitting my niece for a couple of days and had decided we were going to have a brilliant explore on the beach. The weather however, had other ideas. The sun had turned down our invitation to join us on the beach and instead we had the rain cloud relation join the party (we’ve all got one). In true British style, I’d planned a day at the seaside and we were going to have a day at the seaside…whatever the weather. Buckets & spades were shoved back in the car & an introduction to the wonders of the Sealife centre was made instead. Recreating for my niece what I’d done many moons ago as a child her age. To be honest I think I turned into more of a child than her when we started wandering round the tanks. After convincing her she couldn’t get eaten by anything due to the glass we started our Sealife adventure together. Penguin Parade: A Waddle of Fun A surprise for both of us was the penguin enclosure and the feed/talk we watched. I had no idea how much she loved penguins (and by the look on her face neither did she). On more than one occasion did I have to rein in her ridiculously long arms from the temptation of stroking one. Although I have to admit even I was tempted. But we resisted like the good little visitors we were. Making it through the day, managing to only gently poke a starfish in the ‘touch and learn’ area. After the discovery of a new found penguin love (and a pat down to make sure none had mysteriously made it into our pockets) it was time for a quick pitstop for lunch and onto more marine life. Seal Spectacular: Meeting the Ocean's Playful Pups Hearty lunch devoured (at least for my niece, who claimed she wasn’t hungry but proceeded to eat all of her kids meal and half of my sandwich. Now I know how her legs are so long…they’re hollow) we made our way to the seals. Another well timed talk and feed (all planned of course!) gave us both a fantastic view of them, in and out the water. Made all the more memorable by a cheeky seagull swooping in to steal a fish midair, much to my niece’s delight (let’s hope she doesn’t get ideas of how to get more of my food). Seeing the rescue seal pups is always a double-edged sword. On one hand we got to see some very young pups up close, but on the other it means they’ve lost their parent from the nearby seal colony. The saving grace is that they are in the second-best place they can be. All going well they should make it back to their colony in the future. After another pocket pat-down it was on to the main event of most aquariums… the underwater tunnel & big tank. Main Aquarium: A World of Underwater Wildlife Wonders There’s something quite magical and awe-inspiring about being underwater, surrounded by creatures of the deep & being very much in their habitat. It truly makes you appreciate how amazing they are. The standout favourite of the tank had to be the Green Sea Turtle call Ernie (potentially the fasted sea turtle in the west). During our conversations I asked my niece what she thought Ernie would eat. To which she replied, with no hesitation, broccoli. After a little giggle to myself and a silent wish for this adorable 4 year old to never change, we enjoyed an impromptu talk with a staff member. We remained staring up into the tank whilst listening to all the facts and figures about it’s inhabitants. The talk moved on to Ernie and what his life is like. Gliding around the tank with majestic ease. Swimming right above our heads to queue up for his food. The words ‘he enjoys kale and some shrimps’ drifted over the speakers. The turtle stretching up to the water surface. “but his favourite food is on it’s way now” the lady said. Craning to reach his treat, there was a plop in the water. There floating through the blue hued water was an unmistakable florette of broccoli! Hahaha never will I forget the day I learnt the very important lesson of being able to learn something from a 4 year old. Ending the day at Hunstanton Sealife Centre: One giftshop traversed like a military assault course and one ice cream on a very windy and rainy seashore later, we made our way back home. Although the original plan was for some fun on the sand, the rain created an unforgettable & fun filled day out for us both. Not only did we both have fun looking and learning about the animals (and from each other), but I also had the opportunity to introduce her to the amazement of underwater life. It’s experiences like these that inspire my creativity and fuel my passion for sharing how incredible our natural world is. Who knows where my wildlife wonders will take me next, but you’re welcome along for the ride. Feeling inspired? Why not bring a piece of nature into your home with my nature inspired ceramic kits ? And don't forget to share your own wildlife adventures or creations with me on social media using @ArtyPax Let's celebrate the wonders of nature together! Thank you for joining me on this adventure, and happy painting!
- Proud Partners in Conservation: Over £1300 Raised for RSPCA West Hatch Wildlife Centre
At ArtyPax, I’m passionate about nature, wildlife, and the great outdoors. That's why I’m thrilled to share some incredible news: together with the community and the dedicated team at RSPCA West Hatch Wildlife Centre, we've helped raise over £1300 to support their vital wildlife rehabilitation efforts. Through a combination of on-site fundraising, generous donations, exciting raffles (including one of my very own paint your own ceramic kits), and the adventurous Jurassic Coast Challenge undertaken by staff members, we've made a significant impact on the lives of countless animals in need. Fundraising Fun at the RSPCA West Hatch Wildlife Centre: The heart of their fundraising efforts took place at the RSPCA West Hatch Wildlife Centre itself. Visitors were treated to a variety of engaging activities and informative about the centre's crucial work in rescuing and rehabilitating wildlife. Every event was designed to both educate and entertain. The community came out in force, showing their support for the amazing work being done to protect our national wildlife. Donations and Raffles: A significant portion of the funds raised came from the generous donations of individuals who share my passion for wildlife. The centre also organised a series of raffles featuring fantastic prizes, one of which was a special selection of animals in a paint your own kit. Knowing that my ceramic kits played a part in raising these vital funds fills me with immense pride and joy. Jurassic Coast Ultra Challenge: Perhaps the most inspiring part of this fundraising journey was the incredible effort of the RSPCA West Hatch staff members who took on the Jurassic Coast Ultra Challenge. This gruelling 60-mile continuous trek along one of the UK's most beautiful and challenging coastal paths showcased their dedication and commitment to wildlife conservation. Their hard work and perseverance not only raised substantial funds but also heightened awareness about the importance of supporting wildlife rescue and rehabilitation. Thrilled to Make a Difference: At ArtyPax, I am beyond thrilled to have contributed to the success of these fundraising efforts. My mission has always been to connect people with the beauty of nature through ceramics & art and supporting organizations like RSPCA West Hatch Wildlife Centre aligns perfectly with those values. Knowing that the combined efforts of all those involved, alongside the incredible work of the centre and the community, have raised over £1300 is both humbling and exhilarating. A Big Thank You to Everyone Involved: I want to extend my deepest gratitude to everyone who participated in these fundraising activities. Whether you attended an event, made a donation, entered a raffle, or simply spread the word, your support has made a tangible difference. Together, we are helping to ensure that injured and orphaned wildlife receive the care they need to recover and return to their natural habitats. My journey with RSPCA West Hatch Wildlife Centre has been a testament to the power of community and the impact we can make when we come together for a common cause. As we celebrate this incredible milestone of raising over £1300, I remain committed to supporting wildlife conservation and inspiring others to do the same. Thank you for being a part of this wonderful journey with me. Feeling inspired? Join us in continuing to support wildlife conservation by exploring my Nature-Inspired Ceramic Kits or making a donation to RSPCA West Hatch Wildlife Centre. Together, we can make a difference, one ceramic kit and one generous act at a time. Share your stories and support on social media tagging @ArtyPax and @RSPCAWestHatch. Let's keep the momentum going and continue to make a positive impact on our precious wildlife! Thank you for your unwavering support and dedication to wildlife conservation!
- Nature Spotlight: Paint A Turtle
Colour scheme for a Green Sea Turtle: Dive into the world of creativity and oceanic beauty with my step-by-step guide to painting a blank ceramic bisque turtle figure as a stunning green sea turtle (Chelonia mydas). Whether you're an experienced artist or a beginner, this guide will help you get started in creating your masterpiece (with reference photos along the way). Plus, I'll sprinkle in some fun facts about green sea turtles to inspire your artistic journey! Green Sea Turtle Fun Facts: Before we dive into the painting process, let's learn a bit about the fantastic Green Sea Turtle: Ancient Mariners: Green sea turtles have been swimming in our oceans for over 100 million years, making them one of the oldest marine species on Earth. Herbivorous Diet: Unlike other sea turtle species, green sea turtles primarily feed on seagrasses and algae. This diet gives their fat a greenish hue, hence their name. Migratory Marvels: Green sea turtles are known for their long migrations between feeding grounds and nesting sites. Some travel over 2,000 kilometres (1243 miles) to return to the beaches where they were born. Nesting Ritual: Female green sea turtles return to the same beach where they hatched to lay their eggs. They dig deep nests in the sand and can lay up to 200 eggs at a time. Endangered Species: Despite their ancient lineage, green sea turtles are listed as endangered due to threats such as habitat loss, poaching, and climate change. Conservation efforts are crucial to their survival. Now, let's dive into the step-by-step guide on painting your ceramic bisque turtle figure as a Green Sea Turtle: Materials You'll Need To Paint A Turtle: Ceramic Bisque Turtle Figure: Ensure it's clean and dry before you start. Acrylic Paints: Use the colour scheme above to help match your paints to the turtles colours. Paintbrushes: Prepare various brush sizes for different details. Larger brushes for large areas & small finer brushes for detail & small areas. Palette or Paint Palette Paper: Use it to mix and blend colours. A paper plate will also work or a glazed kitchen paint which can be washed & reused. Water Container: Clean your brushes between colour changes. Old mugs or jam jars are great! Paper Towels: Keep them handy for blotting excess paint and cleaning brushes. Protective Surface: Lay down a protective layer to catch any paint drips, including on yourself. Varnish (optional for added durability): Use a water based varnish to protect your work for years to come. Can come in spray-on or brush-on. Both work well the choice is up to you. Step-by-Step Guide: Step 1: Prepare Your Workspace Set up your painting area with all the necessary materials. Ensure your workspace is clean and ideally well-lit. Lay down some a wipe clean tablecloth, paper towels or newspaper to catch any drips and keep your brushes and water cup within reach. Don’t forget an apron or your favourite painting clothes too. Step 2: Base Coat Start by applying a base coat of medium to light green acrylic paint to the entire ceramic bisque turtle figure. Use a medium brush for even coverage. This will serve as the foundation for your green sea turtle. Allow the base coat to dry completely. Step 3: Adding Details to the Shell Mix a darker shade of green by combining green and a touch of black paint (less is more when mixing with black). Use a fine brush to outline and define the scutes (the individual segments) on the turtle's shell. Add some brown paint to create a more realistic, textured look. Blend the colours gently for a natural effect. Step 4: Painting the Flippers & Head Use the same dark green mixture to paint the turtle's flippers and head. Add subtle shading with a mix of green and a tiny amount of blue to create depth and dimension. Highlight the raised areas with a lighter green to mimic the way light would hit a real sea turtle's skin. You can use the tip of the brush or the handle to help create the dots on the skin. Step 5: Eyes & Facial Features Paint the eyes black, leaving a small white dot in each for a lifelike sparkle. Add tiny white lines around the eyes to create a realistic look. Use the fine brush to add details to the mouth and nostrils with a mix of black and brown paint. Step 6: Finishing Touches Add some finishing touches by painting the underside of the turtle a pale green or cream colour. Create a gentle gradient effect to give the figure more realism. Step 7: Seal the Artwork Once your masterpiece is completely dry (use a hair dryer the speed the process along if you're impatient like me!), you can apply a water based sealer (Mod Podge works great) to protect the paint and give your ceramic figure a matte or glossy finish (your choice). This step is optional but recommended for added durability & protection. Creating a painted green sea turtle ceramic bisque figure is a delightful and rewarding project that brings the wonders of the ocean into your home. With this step-by-step guide and a splash of creativity, you'll have a beautiful piece of art that celebrates the beauty of these amazing marine creatures. At ArtyPax I invite you to explore my collection of nature inspired ceramics and embark on your own artistic journey. Happy painting! Remember you don't have to paint it true to life. Use all your creativity and imagination to create a piece that's truly yours.
- How Would You Rather Learn How To Paint?
Take the quick fire 'would you rather' quiz below & help shape the amazing free painting tutorials coming your way soon. You're Amazing! Thank you for completing the quiz. Your choices will help me create some very special content to help give you exactly what you need to learn how to paint and take your pottery painting to the next level. If you're not already signed up to the free ArtyPax newsletter, simply click the button below, enter you're email address & you're good to go. Plus you'll get sent my beginners guide to ceramic painting e-book when you sign up. You'll be the first to hear of new product launches, subscriber only offers & freebies and have access to my soon to release pottery painting tips & tutorials.
- Creating Lasting Memories: Family Friendly Pottery Painting Ideas for Half Term
As the half-term break approaches, families across the UK are gearing up for a week of quality time together. What better way to bond than through the joy of creativity? At ArtyPax we believe in the power of art to bring families closer together. In this blog post, we'll share some fun and creative family friendly pottery painting ideas for half term that are perfect for enjoying with your loved ones. Let’s make some memories! 1) Animal Adventure Kick off your ceramic painting extravaganza with a safari themed adventure. Choose from a variety of animal figurines such as elephants, giraffes, or zebras, and let each family member paint their favourite creature. Encourage storytelling as you bring your animal friends to life with vibrant colours and imaginative designs. Never forget, elephant don’t always have to be grey! 2) Garden Party Delight Bring the beauty of the outdoors indoors with a garden-themed painting session. Select ceramic flower vases, birds, or garden gnomes as your canvas. Decorate each piece with blooming flowers, chirping birds, and buzzing bees. These charming creations will add a touch of natural whimsy to your home or garden. 3) Magical Plate Masterpieces Unleash your inner painter and create personalized plates that are as unique as your family members. Start with plain ceramic plates and let everyone design their own masterpiece. Whether it's a funny quote, a favourite animal, or a special message, these custom plates will be a decoration cherished for years to come. 4) Story Book Characters Come To Life Inspire your little ones' imaginations by painting ceramic figurines inspired by their favourite storybook characters. From fairy tale princesses to fantastical fairies, the possibilities are endless. Encourage creativity as you re-imagine beloved tales through the medium of ceramic painting. 5) Under The Sea Adventure Dive into an ocean of creativity with an under-the-sea themed pottery painting kits. Choose from ceramic fish, seahorses, dolphins or sharks and let your imagination run wild. Experiment with shimmering blues, greens, and purples to create a magical underwater world that will spark the imagination of young and old alike. 6) Cosmic Creations Embark on a cosmic journey with celestial-themed ceramic painting. Explore the wonders of the universe as you paint stars, planets, and galaxies onto ceramic plates or ornaments. Add a touch of sparkle with glitter paint for an extra dose of cosmic magic. Create Your Own Family Friendly Pottery Painting Ideas This half-term break, why not trade screen time for quality family time and unleash your creativity with pottery painting? Whether you're painting whimsical animal figurines, personalized plates, or magical under-the-sea scenes, the possibilities are endless. At ArtyPax, we're here to help you create lasting memories and foster meaningful connections through the joy of art. So gather your loved ones, pick up your paintbrushes, and let the creativity flow. Happy painting!
- The Therapeutic Benefits of Painting Pottery: Embracing Art for Mental Health Awareness Week
As we observe Mental Health Awareness Week, it's important to highlight activities that can positively impact our mental wellbeing. At ArtyPax, I believe in the healing power of art, particularly through painting pottery. Engaging in this creative activity not only brings joy but also offers numerous mental health benefits. Let’s explore how painting nature inspired pottery can be a soothing and therapeutic practice for enhancing mental wellbeing. 1. Reducing Stress and Anxiety: Painting pottery allows you to enter a state of flow, a form of mindfulness where you become fully immersed in the activity at hand. This meditative process helps reduce stress and anxiety by focusing your mind on the present moment. A study published in the Journal of the American Art Therapy Association found that engaging in artistic activities can significantly lower cortisol levels, the body's primary stress hormone. 2. Enhancing Mood and Emotional Expression: Creating art is a powerful way to express emotions that might be difficult to articulate. The act of painting pottery provides a safe space to channel feelings, resulting in improved mood and emotional wellbeing. According to research from the Journal of Positive Psychology, artmaking can boost positive emotions and reduce negative emotions, making it an effective tool for emotional regulation. 3. Boosting Self-Esteem and Confidence: Completing a pottery painting project instils a sense of accomplishment and pride. This boost in self-esteem can enhance overall confidence, encouraging individuals to take on new challenges both in art and in life. The British Journal of Occupational Therapy highlights the positive impact of creative activities on self-esteem and personal satisfaction. 4. Promoting Relaxation and Mental Clarity: The repetitive motions of brush strokes and the tactile experience of working with pottery can promote relaxation and mental clarity. Engaging in such activities helps quiet the mind and fosters a sense of inner peace. The Art Therapy Association notes that the rhythmic nature of painting can induce a state of relaxation similar to meditation. 5. Fostering Social Connections: Painting pottery can be a social activity, whether it's done with family, friends, or in a community setting. These shared experiences foster social connections, reducing feelings of isolation and loneliness. Group art sessions have been shown to improve social interactions and build supportive networks, as reported in the Journal of Applied Arts & Health. 6. Encouraging Mindfulness and Focus: The intricate details involved in painting pottery require careful attention and focus. This practice of mindfulness can help improve concentration and reduce symptoms of attention-related issues. The American Psychological Association emphasises the benefits of mindfulness in enhancing cognitive function and overall mental well-being. Conclusion to the Benefits of Painting Pottery: As we celebrate Mental Health Awareness Week, let's embrace the therapeutic benefits of painting pottery. At ArtyPax we offer a wide range of paint your own pottery kits designed to bring the beauty of nature into your creative process. Whether you're looking to reduce stress, enhance mood, or foster social connections, painting pottery is a wonderful way to nurture your mental health. Explore our collection and start your journey toward wellbeing through art today. Don’t forget there’s no right or wrong when it comes to painting, paint your way. Discover the joy of painting pottery and its mental health benefits by browsing my Nature-Inspired Pottery Kits. Share your creative journey with us on social media tagging @ArtyPax and join the conversation this Mental Health Awareness Week.
- The Perfect Ceramic Gifts for Bird Lovers
Calling all bird enthusiasts and nature lovers! At ArtyPax I’m delighted to highlight our exquisite collection of bird themed pottery which is sure to delight avian enthusiasts across the UK. From majestic barn owls to colourful kingfishers, my ceramic birds capture the beauty and grace of these feathered creatures. Join me as we soar through our avian-inspired collection and discover the perfect ceramic gifts for bird lovers. Puffins: Charismatic Companions of the Sea Step into the world of seabirds with my charming puffin ceramic. With their distinctive colourful beaks and tuxedo-like plumage, puffins are beloved symbols of coastal wildlife. My puffin ceramics capture the whimsy and charisma of these seabirds, making them a delightful addition to any bird lover's collection. Barn Owls: Guardians of the Night Sky Evoke the mystery and allure of the nocturnal world with my majestic barn owl ceramic. With their silent flight and haunting calls, barn owls have captivated the imaginations of bird enthusiasts for centuries. My barn owl ceramics beautifully capture the elegance and grace of these nocturnal hunters, making them a striking centrepiece for any home or garden. Pheasants: Splendid Symbols of the Countryside Celebrate the beauty of the British countryside with my splendid pheasant ceramic. With their vibrant plumage and regal demeanour, pheasants are a sight to behold in rural landscapes. My pheasant ceramics bring the charm of the countryside indoors, adding a touch of rustic elegance to any decor. Chickens: Quirky Characters of the Farmyard Bring a touch of farmyard whimsy to your home with my quirky chicken ceramic. Whether you're a backyard poultry keeper or simply appreciate the charm of these feathered friends, my chicken ceramics are sure to delight. With their colourful plumage and endearing personalities, chickens add a playful touch to any space. Kingfishers: Jewel-toned Gems of the Waterways Dive into the world of rivers and streams with my exquisite kingfisher ceramic. With their dazzling plumage and lightning-fast dives, kingfishers are true jewels of the waterways. My kingfisher ceramics capture the vibrancy and energy of these aquatic birds, bringing a splash of colour to any setting. Ducks: Quacking Companions of Lakes and Ponds Embrace the tranquillity of lakeside living with my delightful duck ceramics. With their gentle quacks and graceful glides, ducks are beloved symbols of peaceful waterways. My duck ceramics evoke the serenity of lakeside landscapes, making them a soothing presence in any home or garden. Explore your perfect gift for bird lovers Whether you're an avid bird watcher or simply appreciate the beauty of nature, my bird themed ceramics are sure to delight. From the whimsical charm of puffins to the regal elegance of barn owls, my collection offers something for every avian enthusiast. Shop now and bring the beauty of the bird world into your home with ArtyPax.
- Painting Dreams into Reality: My Experience at the SBS Event 2024 with Theo Paphitis
Step into the world of entrepreneurial excitement and inspiration as I share my unforgettable journey to the prestigious SBS Event 2024, hosted by none other than the esteemed entrepreneur and business mogul, Theo Paphitis. At ArtyPax, I had the incredible opportunity to collect my SBS (Small Business Sunday) winners award for my nature inspired paint your own pottery kits & artwork, as well as connect with like-minded individuals from across the SBS winners portfolio. Join me as I recount my experience and the valuable insights gained from meeting Theo Paphitis himself. Meeting Theo Paphitis: A Moment of Inspiration As I stepped into the bustling atmosphere of the SBS Event 2024 (held at the Birmingham International Convention Centre), I was filled with anticipation and excitement. The energy was palpable as SBS winning entrepreneurs and business owners gathered to celebrate innovation and success. Meeting Theo Paphitis was a highlight of the event, as his passion for supporting small businesses and nurturing entrepreneurial talent shone through in every interaction. Plus he was the reason we had all been brought together in the first place, having all been hand picked by him as winners over the last 14 years. The motivation and self-belief he helps garner is invaluable to people like myself. So watch this space for ArtyPax getting even bigger & better in coming years! Celebrating My Nature Inspired Pottery Kits Amidst the sea of creativity and innovation, it was a humbling testament to how far ArtyPax has come since 2006. From small pottery painting kits back then to a now broad range of creatures from the natural world. Each pottery kit offering the chance to celebrate the wonders of wildlife & offering the chance of calming artistic expression. I had the opportunity to share my passion for nature inspired art with fellow entrepreneurs, industry experts, and potential customers alike. Networking and Collaboration Opportunities One of the most valuable aspects of the SBS Event 2024 was the opportunity to network and forge meaningful connections with other business owners and industry leaders. We engaged in fruitful discussions, exchanged ideas, and explored potential collaboration opportunities that have the potential to elevate our businesses to new heights. The Power of Small Business Support The SBS Event 2024 served as a reminder of the invaluable support and resources available to small businesses in the UK. Theo Paphitis's unwavering commitment to championing small businesses is not only inspiring but also serves as a driving force behind my entrepreneurial journey. His words of wisdom and encouragement will continue to resonate with me as I navigate the ever-evolving landscape of being a small business. Conclusion of visiting the SBS Event: My experience at the SBS Event 2024 was nothing short of transformative. From meeting Theo Paphitis to showcasing attending the informative sessions by partners such as Google, I gained invaluable insights, forged meaningful connections, and was inspired to continue painting my dreams into reality. As I continue my small business journey, I remain grateful for the support of the small business community and the opportunity to be part of such a vibrant and dynamic event, as well as you (my lovely customers). At ArtyPax I am committed to bringing the beauty of nature inspired art to homes across the UK, one pottery kit at a time.